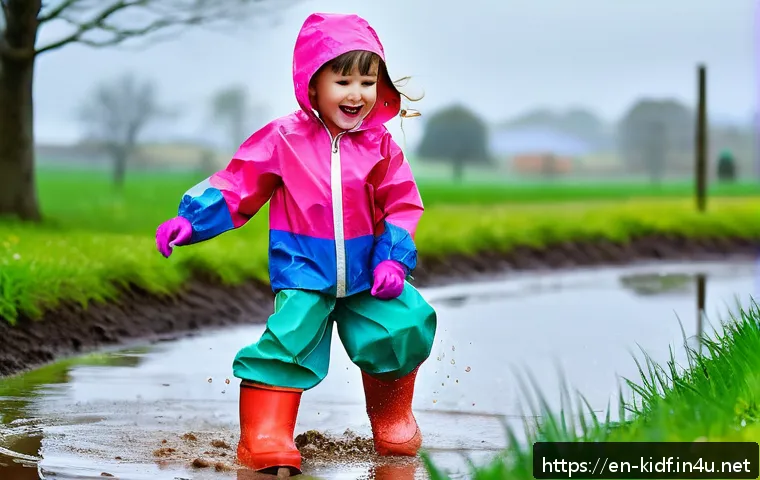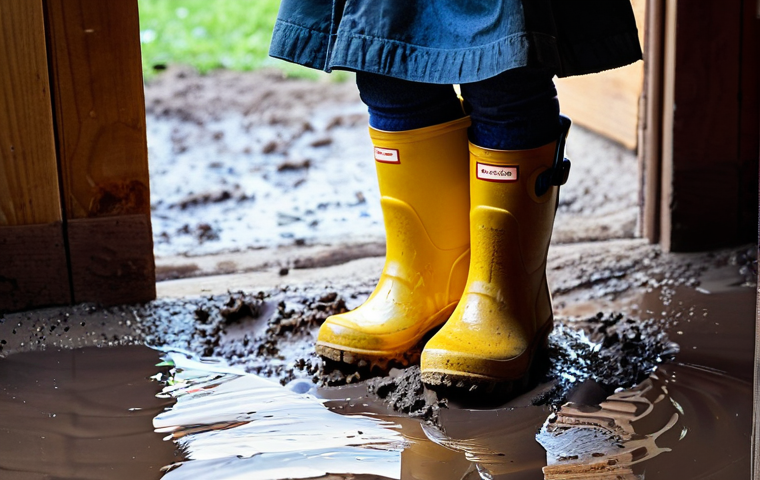
Oh, the joy of childhood! There’s really nothing quite like watching your little ones splash fearlessly through puddles, is there? Those bright, colorful rain boots are practically a uniform for their outdoor adventures.
But let’s be honest, as soon as the fun stops, a new challenge begins: keeping those well-loved (and often very muddy!) boots clean, fresh, and ready for the next downpour.
I’ve spent my fair share of evenings wrestling with caked-on mud and that unmistakable ‘wet shoe’ smell, wondering if they’d ever look new again. From my experience, a little proactive care goes a long way, not just in aesthetics but in making them last longer, saving you money, and ensuring those tiny feet stay dry and comfortable.
Forget the endless scrubbing; I’ve got some fantastic tips and tricks that will make this chore a breeze, even for the busiest of parents. Let’s discover how to keep those kiddie wellies sparkling and ready for any weather!
Conquering the Mud Monster: First-Aid for Filthy Footwear
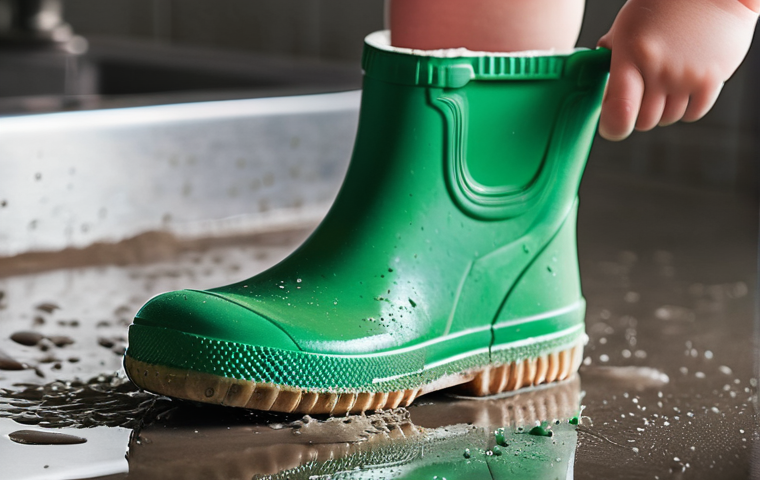
Oh, the sheer joy (and subsequent mess) of a child and a mud puddle! It’s a rite of passage, isn’t it? But then they track it all in, and suddenly you’re staring at wellies caked in what looks like ancient history. I’ve been there, many, many times. My first instinct used to be to just hose them down, but I quickly learned that a little strategy goes a long way. The key here is immediate action – don’t let that mud dry and harden into a concrete-like shell! When my little adventurers come storming in, I’ve got a designated “boot station” right by the door. This little setup, usually just a small basin or an old towel, saves my floors from a whole lot of grief. I’ve found that brushing off the loose, wet mud before it gets a chance to truly bond with the rubber is half the battle won. Seriously, it’s a game-changer for reducing overall cleaning time and preventing those stubborn stains from setting in. This initial effort might seem like an extra step, but trust me, it prevents a much bigger headache later on, and who needs more headaches when you’re a parent?
The Gentle Wash: Tackling Surface Grime
Once the worst of the mud is off, it’s time for a proper, but still gentle, wash. For everyday dirt and splashes, a simple soft cloth or sponge with some warm water and a tiny drop of mild dish soap is usually all you need. I always opt for something gentle, like what I’d use for my own hands, because harsh chemicals can actually degrade the rubber or PVC over time, shortening the lifespan of those beloved boots. When I’m scrubbing, I pay special attention to the seams and any textured areas where dirt loves to hide. It’s surprising how much gunk can accumulate in those little crevices! After a good wipe-down, I make sure to rinse them thoroughly under cool, running water. You don’t want any soap residue lingering, as that can attract more dirt or even dry out the material. I find that a quick rinse in the utility sink works perfectly, or even just hosing them off outside if the weather permits. It’s all about being consistent with this routine, making it part of the post-adventure cleanup, and I’ve seen a huge difference in how clean and fresh my kids’ boots stay.
Deep Dive Duty: When Dirt Gets Stubborn
Sometimes, though, the mud isn’t just mud; it’s a concoction of dirt, grass stains, and maybe even some unidentifiable playground slime. For those truly challenging messes, you need to bring out the big guns, or at least, slightly bigger guns. I’ve had great success with a soft-bristled brush – an old toothbrush works wonders for intricate areas – and a paste made from baking soda and a little water. This natural abrasive is fantastic for gently lifting tough stains without scratching the boot material. I just apply the paste, let it sit for a few minutes, and then gently scrub. For grass stains, which are notoriously tricky, I’ve even dabbed a bit of rubbing alcohol on a cotton ball and gently wiped the area, but always test this on an inconspicuous spot first! It’s all about patience and persistence. After tackling these stubborn spots, I give them a full wash and rinse, just like with the surface grime. This extra effort might take an additional 10 minutes, but it truly restores the boots to their former glory, making them look almost brand new, and who doesn’t love that?
The Great Indoors: Drying Dilemmas Solved
Okay, so you’ve conquered the mud and scrubbed away the grime. Now comes a crucial step that many parents, myself included, often overlook until it’s too late: proper drying. Trust me, nothing ruins a good cleaning effort faster than improper drying, which can lead to that infamous damp, mildewy smell or, even worse, damage to the boot material. I learned this the hard way after leaving a pair of slightly damp boots in a dark closet for a few days – the smell was… memorable. Now, I treat the drying process with as much importance as the cleaning itself. The goal is to get them completely dry, inside and out, without subjecting them to extreme heat. It’s a delicate balance, and I’ve tried a few methods that actually work wonders, keeping those tiny toes happy and their boots ready for the next puddle-jumping mission. This stage is where you really prevent those nasty odors from setting in, extending the life of the boots and saving your nose from an unpleasant surprise.
Air-Drying Like a Pro: The Natural Way
My go-to method for drying rain boots is good old-fashioned air-drying. It’s simple, effective, and free! After washing, I always shake out any excess water from the inside of the boots. Then, I place them upside down, or at an angle, in a well-ventilated area. A sunny spot near an open window or in a room with a fan works perfectly. The key here is circulation. If you just leave them upright, the inside can stay damp for ages, becoming a breeding ground for bacteria and that dreaded funk. I sometimes use a boot dryer, but for most days, just propping them up on a boot rack or even upside down on a laundry line works beautifully. Just remember to keep them out of direct, intense sunlight for extended periods, as UV rays can fade colors and degrade rubber over time. I usually check them every few hours, and if they’re still damp, I might reposition them to ensure all surfaces get adequate airflow. This method might take a bit longer than using heat, but it’s the safest and most gentle way to dry, ensuring those boots stay in tip-top shape.
The Newspaper Trick: Absorbing Inner Dampness
For those times when the insides of the boots are particularly soaked, or if you need them dry a bit faster, I swear by the humble newspaper trick. It’s an oldie but a goodie! After shaking out as much water as possible, I crumple up sheets of plain newspaper and stuff them firmly inside each boot. The newspaper is incredibly absorbent and will draw out the moisture like magic. I usually change the newspaper every couple of hours, or once it feels damp, until the boots are completely dry inside. You’d be amazed at how effective this is, especially overnight. Just be sure to use plain, black-and-white newspaper – colored inks can sometimes bleed and stain the lining, which you definitely want to avoid. If you don’t have newspaper, paper towels can work in a pinch, but they’re often not as absorbent and you’ll go through a lot more of them. This technique is fantastic for getting rid of that lingering dampness that can lead to mildew, making sure the boots are not just clean on the outside but fresh and dry where it counts – for those precious little feet.
Banish the Stink: Odor-Proofing Your Little One’s Wellies
Let’s be real, there’s a certain “eau de wellie” that can develop, especially after a particularly enthusiastic day of splashing. It’s not exactly Chanel No. 5, is it? That tell-tale musty, sometimes slightly cheesy, smell is usually a sign of dampness and bacteria having a little party inside the boots. And trust me, once it sets in, it’s a tough guest to get rid of! I’ve been in that position where I open the closet and a wave of “wet shoe” hits me, making me instantly regret not being more proactive. But over time, I’ve developed a few tried-and-true methods for not just masking, but truly eliminating those unpleasant odors. It’s all about tackling the root cause – moisture and microbes – and being consistent with your approach. Keeping these boots fresh isn’t just about pleasant smells for my home; it’s about ensuring my kids’ feet stay healthy and comfortable, because nobody wants to put their foot into a stinky, damp boot!
Baking Soda to the Rescue: A Natural Deodorizer
My absolute favorite weapon against boot odor is plain old baking soda. It’s inexpensive, natural, and incredibly effective at absorbing smells. After the boots are completely dry (and this is key – never use it on wet boots), I sprinkle a generous amount of baking soda into each boot. For particularly stubborn smells, I might even add a few drops of essential oil, like tea tree or lavender, directly onto the baking soda for an extra freshening boost. I let the baking soda sit overnight, or even for 24 hours if the smell is really pervasive. The longer it sits, the more odor it absorbs. Then, I simply shake it out or use a small vacuum attachment to remove all the powder. You’ll be amazed at the difference! The boots come out smelling neutral and fresh, ready for another round of adventures. I keep a box of baking soda handy specifically for this purpose, and it’s become a regular part of my boot maintenance routine, especially during the wetter months when those boots are getting a lot of use.
The Sunlight Solution: UV Power for Freshness
Another fantastic natural odor killer is sunlight, or more specifically, the UV rays it emits. When the boots are clean and dry, placing them outside in a sunny spot for a few hours can work wonders. The UV light acts as a natural disinfectant, killing bacteria and fungi that cause odors. I usually turn them upside down first to get the insides some direct exposure, and then flip them upright to let the sun hit the outsides. Just a word of caution: don’t leave them out for too long, especially on a scorching hot day, as prolonged, intense sun exposure can eventually degrade the rubber and cause fading. A few hours is usually plenty to zap those odors away. I’ve noticed a significant improvement in freshness after a good sunbath, especially for boots that have been stored away for a while or have developed a lingering damp smell. It’s a simple, eco-friendly way to keep things smelling sweet without relying on artificial sprays or chemicals.
Beyond the Basics: Advanced Care for Longevity
You know, it’s not just about cleaning and drying; truly extending the life of your kids’ rain boots involves a bit of proactive care and understanding of the materials. I’ve gone through enough pairs to realize that a little extra effort can save you a fair bit of money in the long run. There’s nothing more frustrating than a crack appearing in a perfectly good pair of boots, or the colors fading prematurely. It’s often due to environmental factors or just general wear and tear that could have been mitigated with some simple preventative measures. I used to just buy new ones when the old ones gave out, but I’ve since become a bit of a boot longevity enthusiast, finding ways to keep them looking great and functioning perfectly for as long as possible. This means understanding their “skin” and giving it the occasional nourishment it needs, just like we care for our own. After all, these aren’t just boots; they’re vital gear for childhood exploration!
Conditioning for Suppleness: Preventing Cracks and Fades
Most children’s rain boots are made from natural rubber or PVC. While both are durable, they can dry out over time, especially with exposure to sun, heat, and repeated wetting and drying. This drying can lead to those unsightly cracks that eventually compromise their waterproof integrity. To combat this, I occasionally (maybe once every few months, or if they look particularly dull) use a rubber boot conditioner or a very small amount of silicone-based protectant. You can find these at outdoor or shoe stores, and a little goes a long way. I apply a thin layer with a soft cloth after the boots are clean and completely dry, then buff off any excess. This helps to keep the material supple, prevents it from drying out, and even restores some of that original luster. It’s a bit like moisturizing their skin – it keeps them healthy and prevents premature aging. For PVC boots, a simple wipe with a damp cloth and then a dry buff is usually sufficient, as they tend to be less prone to drying out than natural rubber.
Inspecting for Wear and Tear: Catching Issues Early
Regular inspection is another crucial step in advanced boot care. Before and after each wear (or at least weekly during heavy use), I give the boots a quick once-over. I’m looking for any signs of trouble: tiny cracks, scuffs, areas where the sole might be starting to separate, or any holes. Catching these small issues early can prevent them from becoming big, boot-ruining problems. For minor scuffs, sometimes a gentle rub with a rubber eraser or a bit of baking soda paste can make them disappear. If I spot a tiny crack, I might try a specialized rubber repair glue, but only for very small, superficial ones. Any significant damage usually means it’s time for a new pair, as compromising the waterproof barrier defeats the whole purpose of a rain boot. I also check the treads for excessive wear, as worn-down treads can make them slippery and unsafe. Being observant here can save you from unexpected leaks and ensure your child’s feet stay dry and safe.
Smart Storage Solutions: Keeping Boots Ready for Action
Alright, so the boots are sparkling clean, perfectly dry, and smelling fresh – fantastic! But the journey isn’t over yet. How you store those wellies between adventures is just as important as how you clean them. I used to just toss them into a bin by the door, and while convenient, I quickly realized this wasn’t ideal. They’d get squashed, sometimes they wouldn’t dry properly, and it just made for a messy entry. Effective storage isn’t just about tidiness; it’s about maintaining their shape, preventing damage, and ensuring they’re always ready for the next spontaneous puddle jump. Think about it: a crumpled boot can develop permanent creases, and leaving them in a dark, damp corner is just inviting mold and mildew. So, I’ve refined my boot storage strategy, and it’s made a noticeable difference in how long our boots last and how easy it is to grab them and go. It’s truly about setting up a system that supports both the boots’ longevity and your family’s daily flow.
Upright and Elevated: The Best Stance for Boots
My top tip for storage is to keep boots upright and, if possible, slightly elevated. This prevents them from collapsing on themselves, which can create creases and stress points in the rubber or PVC, leading to cracks over time. A boot rack is a fantastic investment if you have space. They allow air to circulate around and inside the boots, which is crucial for preventing any residual dampness from turning into a nasty smell. If a boot rack isn’t an option, even placing them on a shoe tray with some space between them in an airy spot works. I’ve even seen clever DIY solutions using PVC pipes or even inverted plastic bottles to keep the shafts upright. The goal is to maintain their natural shape and allow for consistent airflow. This also makes them super easy to grab when those inevitable rain clouds roll in, saving you from a frantic search for matching, unstuffed boots. It’s a small change that yields big results in terms of boot health and overall household organization.
Seasonal Swaps: Protecting for the Off-Season
When the warmer months arrive and rain boots go into hibernation, proper off-season storage becomes paramount. Simply tossing them into a box in a dusty corner of the garage is a recipe for disaster. Before storing them away for an extended period, I always give them a thorough cleaning, drying, and conditioning (as discussed earlier). Then, to help them hold their shape, I might stuff the shafts with rolled-up newspaper (plain, remember!) or even cardboard tubes. This prevents them from slumping and developing creases. I store them in a cool, dry, dark place – away from direct sunlight or extreme temperatures, which can both degrade the material. A breathable fabric bag can also be a good idea to protect them from dust. I make sure not to stack anything heavy on top of them, as this can also cause damage. When the rainy season returns, they’ll emerge looking and feeling just as good as they did when they were put away, ready for new adventures!
DIY Boot Boosters: Simple Hacks for Happy Feet
Sometimes, it’s the little things, the clever hacks, that make the biggest difference in keeping those tiny feet happy and dry in their rain boots. Over the years, I’ve picked up a few fantastic DIY tips that go beyond just cleaning – they enhance comfort, prevent issues, and just make the whole rain-boot experience better for everyone involved. I remember one miserable afternoon when my youngest’s socks kept slipping down inside his boots, causing endless fussing and discomfort. That’s when I started experimenting with little tricks to make those wellies even more user-friendly. It’s not always about buying the latest gadget; often, the best solutions are simple, inexpensive, and use things you probably already have around the house. These aren’t just about extending the life of the boots, but about making sure the little ones actually enjoy wearing them, which, let’s be honest, is half the battle won when you’re a parent!
The Sock-Saver Secret: Keeping Socks in Place
If your child is anything like mine, their socks have a mysterious habit of disappearing down into the depths of their rain boots. This leads to uncomfortable bunching, rubbing, and a generally unhappy kid. My simple hack for this is to use a pair of long, knee-high socks, or even better, invest in some specific boot socks. However, if you’re using regular socks, a little piece of double-sided tape or even a tiny dab of fabric glue (the temporary kind!) placed on the inside cuff of the boot, just enough to gently adhere to the sock, can work wonders. Another trick I’ve heard (though haven’t personally tried) is to use a small, thin piece of elastic sewn onto the sock itself, just above the ankle, which then hooks under the boot’s top edge. For my kids, simply ensuring they wear tall enough socks that can be folded over the boot cuff usually does the trick. This prevents the dreaded sock-slide and keeps those little feet comfy, allowing them to focus on the fun of splashing instead of wriggling their toes to pull up their socks.
DIY Inner Comfort: Adding Warmth and Cushion
Rain boots, by their very nature, aren’t always the coziest. They’re designed for protection, not necessarily for warmth or plush comfort. But this is where you can get a little creative! For extra warmth on chilly, rainy days, I often add a pair of cozy fleece or wool insoles. You can buy these cheaply, or even cut them from an old, clean fleece blanket. They add a layer of insulation and make the boots feel much softer underfoot. Another great idea is to have a dedicated pair of “boot liners” – essentially thick, tall socks designed to peek out over the top of the boot. These not only add warmth and comfort but also protect the inside of the boots and can be easily removed for washing. For a quick, temporary fix if you’re out and about, even a few layers of newspaper (again, plain!) folded neatly can provide a bit of insulation. These simple additions can transform a basic pair of wellies into a snug haven for little feet, making those cold, wet adventures much more enjoyable for everyone.
Choosing Wisely: A Quick Guide to Durable Kids’ Boots
Let’s be honest, sometimes the best “care” starts before you even bring the boots home. Investing a little time in choosing the right pair of rain boots can save you a world of hurt (and money!) down the line. I’ve made my share of impulse buys, drawn in by cute patterns, only to find them falling apart after a few months. That’s why I’ve learned to be a bit more discerning. It’s not just about the look; it’s about the material, the construction, and how well it stands up to the rigorous demands of childhood. A durable pair of boots means fewer headaches, less frequent replacements, and ultimately, a happier budget. From my experience, prioritizing quality over fleeting trends is always the smarter play, especially when it comes to something as essential as keeping little feet dry and protected during those inevitable wet weather adventures. After all, a good pair of wellies is truly an investment in your child’s outdoor fun and comfort.
Material Matters: Rubber vs. PVC
When you’re shopping for kids’ rain boots, you’ll primarily encounter two materials: natural rubber and PVC (polyvinyl chloride). Each has its pros and cons, and understanding them can help you make an informed choice. Natural rubber boots tend to be more flexible, softer, and often more comfortable for active kids. They are also generally more environmentally friendly if sourced responsibly. However, they can be more susceptible to drying out and cracking if not properly cared for with conditioning. PVC boots, on the other hand, are typically more rigid and less expensive. They are very durable and resistant to chemicals and abrasions, making them a good option for truly rough-and-tumble play. They’re also less prone to drying out than natural rubber. The downside is they might not be as comfortable or breathable, and their environmental impact can be higher. I’ve found that for younger, more active kids, the flexibility of rubber is often preferred, but for older children who are particularly tough on their gear, a sturdy PVC might hold up better. It’s all about balancing comfort, durability, and your budget.
Construction is Key: Checking for Quality
Beyond the material, the way a boot is constructed significantly impacts its longevity and waterproof capabilities. Before buying, I always give the boots a thorough once-over. I look for reinforced seams where the sole meets the upper – this is a common failure point. Good quality boots will have solid, even seams with no visible gaps or weak spots. I also check the sole itself; is it sturdy with good tread for traction? A flimsy sole will wear out quickly and offer poor grip. The shaft of the boot should feel robust enough to stand up on its own, not flimsy. If there’s any lining, I check that it’s securely attached and doesn’t feel like it will tear or bunch up easily. While a higher price point doesn’t always guarantee quality, it’s often a good indicator that more durable materials and better construction methods have been used. Remember, you’re looking for something that can withstand countless puddles, mud slides, and general kid-chaos, so a little scrutiny before you buy can save you a lot of frustration later.
| Cleaning Scenario | Recommended Approach | Key Tools/Ingredients |
|---|---|---|
| Everyday Mud & Grime | Quick rinse/wipe down immediately after use to prevent drying. | Warm water, mild dish soap, soft cloth/sponge. |
| Stubborn Stains (Grass, Heavy Dirt) | Pre-treat stains, then gentle scrubbing. | Soft-bristled brush (old toothbrush), baking soda paste, rubbing alcohol (for grass, test first). |
| Damp Interior/Odor | Ensure thorough drying; absorb moisture and neutralize smells. | Crumpled newspaper, baking soda, essential oils (optional), boot dryer/fan. |
| Dull Rubber/Prevent Cracks | Condition material to maintain suppleness and prevent degradation. | Rubber boot conditioner, silicone protectant, soft cloth. |
Conquering the Mud Monster: First-Aid for Filthy Footwear
Oh, the sheer joy (and subsequent mess) of a child and a mud puddle! It’s a rite of passage, isn’t it? But then they track it all in, and suddenly you’re staring at wellies caked in what looks like ancient history. I’ve been there, many, many times. My first instinct used to be to just hose them down, but I quickly learned that a little strategy goes a long way. The key here is immediate action – don’t let that mud dry and harden into a concrete-like shell! When my little adventurers come storming in, I’ve got a designated “boot station” right by the door. This little setup, usually just a small basin or an old towel, saves my floors from a whole lot of grief. I’ve found that brushing off the loose, wet mud before it gets a chance to truly bond with the rubber is half the battle won. Seriously, it’s a game-changer for reducing overall cleaning time and preventing those stubborn stains from setting in. This initial effort might seem like an extra step, but trust me, it prevents a much bigger headache later on, and who needs more headaches when you’re a parent?
The Gentle Wash: Tackling Surface Grime
Once the worst of the mud is off, it’s time for a proper, but still gentle, wash. For everyday dirt and splashes, a simple soft cloth or sponge with some warm water and a tiny drop of mild dish soap is usually all you need. I always opt for something gentle, like what I’d use for my own hands, because harsh chemicals can actually degrade the rubber or PVC over time, shortening the lifespan of those beloved boots. When I’m scrubbing, I pay special attention to the seams and any textured areas where dirt loves to hide. It’s surprising how much gunk can accumulate in those little crevices! After a good wipe-down, I make sure to rinse them thoroughly under cool, running water. You don’t want any soap residue lingering, as that can attract more dirt or even dry out the material. I find that a quick rinse in the utility sink works perfectly, or even just hosing them off outside if the weather permits. It’s all about being consistent with this routine, making it part of the post-adventure cleanup, and I’ve seen a huge difference in how clean and fresh my kids’ boots stay.
Deep Dive Duty: When Dirt Gets Stubborn
Sometimes, though, the mud isn’t just mud; it’s a concoction of dirt, grass stains, and maybe even some unidentifiable playground slime. For those truly challenging messes, you need to bring out the big guns, or at least, slightly bigger guns. I’ve had great success with a soft-bristled brush – an old toothbrush works wonders for intricate areas – and a paste made from baking soda and a little water. This natural abrasive is fantastic for gently lifting tough stains without scratching the boot material. I just apply the paste, let it sit for a few minutes, and then gently scrub. For grass stains, which are notoriously tricky, I’ve even dabbed a bit of rubbing alcohol on a cotton ball and gently wiped the area, but always test this on an inconspicuous spot first! It’s all about patience and persistence. After tackling these stubborn spots, I give them a full wash and rinse, just like with the surface grime. This extra effort might take an additional 10 minutes, but it truly restores the boots to their former glory, making them look almost brand new, and who doesn’t love that?
The Great Indoors: Drying Dilemmas Solved
Okay, so you’ve conquered the mud and scrubbed away the grime. Now comes a crucial step that many parents, myself included, often overlook until it’s too late: proper drying. Trust me, nothing ruins a good cleaning effort faster than improper drying, which can lead to that infamous damp, mildewy smell or, even worse, damage to the boot material. I learned this the hard way after leaving a pair of slightly damp boots in a dark closet for a few days – the smell was… memorable. Now, I treat the drying process with as much importance as the cleaning itself. The goal is to get them completely dry, inside and out, without subjecting them to extreme heat. It’s a delicate balance, and I’ve tried a few methods that actually work wonders, keeping those tiny toes happy and their boots ready for the next puddle-jumping mission. This stage is where you really prevent those nasty odors from setting in, extending the life of the boots and saving your nose from an unpleasant surprise.
Air-Drying Like a Pro: The Natural Way
My go-to method for drying rain boots is good old-fashioned air-drying. It’s simple, effective, and free! After washing, I always shake out any excess water from the inside of the boots. Then, I place them upside down, or at an angle, in a well-ventilated area. A sunny spot near an open window or in a room with a fan works perfectly. The key here is circulation. If you just leave them upright, the inside can stay damp for ages, becoming a breeding ground for bacteria and that dreaded funk. I sometimes use a boot dryer, but for most days, just propping them up on a boot rack or even upside down on a laundry line works beautifully. Just remember to keep them out of direct, intense sunlight for extended periods, as UV rays can fade colors and degrade rubber over time. I usually check them every few hours, and if they’re still damp, I might reposition them to ensure all surfaces get adequate airflow. This method might take a bit longer than using heat, but it’s the safest and most gentle way to dry, ensuring those boots stay in tip-top shape.
The Newspaper Trick: Absorbing Inner Dampness
For those times when the insides of the boots are particularly soaked, or if you need them dry a bit faster, I swear by the humble newspaper trick. It’s an oldie but a goodie! After shaking out as much water as possible, I crumple up sheets of plain newspaper and stuff them firmly inside each boot. The newspaper is incredibly absorbent and will draw out the moisture like magic. I usually change the newspaper every couple of hours, or once it feels damp, until the boots are completely dry inside. You’d be amazed at how effective this is, especially overnight. Just be sure to use plain, black-and-white newspaper – colored inks can sometimes bleed and stain the lining, which you definitely want to avoid. If you don’t have newspaper, paper towels can work in a pinch, but they’re often not as absorbent and you’ll go through a lot more of them. This technique is fantastic for getting rid of that lingering dampness that can lead to mildew, making sure the boots are not just clean on the outside but fresh and dry where it counts – for those precious little feet.
Banish the Stink: Odor-Proofing Your Little One’s Wellies
Let’s be real, there’s a certain “eau de wellie” that can develop, especially after a particularly enthusiastic day of splashing. It’s not exactly Chanel No. 5, is it? That tell-tale musty, sometimes slightly cheesy, smell is usually a sign of dampness and bacteria having a little party inside the boots. And trust me, once it sets in, it’s a tough guest to get rid of! I’ve been in that position where I open the closet and a wave of “wet shoe” hits me, making me instantly regret not being more proactive. But over time, I’ve developed a few tried-and-true methods for not just masking, but truly eliminating those unpleasant odors. It’s all about tackling the root cause – moisture and microbes – and being consistent with your approach. Keeping these boots fresh isn’t just about pleasant smells for my home; it’s about ensuring my kids’ feet stay healthy and comfortable, because nobody wants to put their foot into a stinky, damp boot!
Baking Soda to the Rescue: A Natural Deodorizer
My absolute favorite weapon against boot odor is plain old baking soda. It’s inexpensive, natural, and incredibly effective at absorbing smells. After the boots are completely dry (and this is key – never use it on wet boots), I sprinkle a generous amount of baking soda into each boot. For particularly stubborn smells, I might even add a few drops of essential oil, like tea tree or lavender, directly onto the baking soda for an extra freshening boost. I let the baking soda sit overnight, or even for 24 hours if the smell is really pervasive. The longer it sits, the more odor it absorbs. Then, I simply shake it out or use a small vacuum attachment to remove all the powder. You’ll be amazed at the difference! The boots come out smelling neutral and fresh, ready for another round of adventures. I keep a box of baking soda handy specifically for this purpose, and it’s become a regular part of my boot maintenance routine, especially during the wetter months when those boots are getting a lot of use.
The Sunlight Solution: UV Power for Freshness
Another fantastic natural odor killer is sunlight, or more specifically, the UV rays it emits. When the boots are clean and dry, placing them outside in a sunny spot for a few hours can work wonders. The UV light acts as a natural disinfectant, killing bacteria and fungi that cause odors. I usually turn them upside down first to get the insides some direct exposure, and then flip them upright to let the sun hit the outsides. Just a word of caution: don’t leave them out for too long, especially on a scorching hot day, as prolonged, intense sun exposure can eventually degrade the rubber and cause fading. A few hours is usually plenty to zap those odors away. I’ve noticed a significant improvement in freshness after a good sunbath, especially for boots that have been stored away for a while or have developed a lingering damp smell. It’s a simple, eco-friendly way to keep things smelling sweet without relying on artificial sprays or chemicals.
Beyond the Basics: Advanced Care for Longevity
You know, it’s not just about cleaning and drying; truly extending the life of your kids’ rain boots involves a bit of proactive care and understanding of the materials. I’ve gone through enough pairs to realize that a little extra effort can save you a fair bit of money in the long run. There’s nothing more frustrating than a crack appearing in a perfectly good pair of boots, or the colors fading prematurely. It’s often due to environmental factors or just general wear and tear that could have been mitigated with some simple preventative measures. I used to just buy new ones when the old ones gave out, but I’ve since become a bit of a boot longevity enthusiast, finding ways to keep them looking great and functioning perfectly for as long as possible. This means understanding their “skin” and giving it the occasional nourishment it needs, just like we care for our own. After all, these aren’t just boots; they’re vital gear for childhood exploration!
Conditioning for Suppleness: Preventing Cracks and Fades
Most children’s rain boots are made from natural rubber or PVC. While both are durable, they can dry out over time, especially with exposure to sun, heat, and repeated wetting and drying. This drying can lead to those unsightly cracks that eventually compromise their waterproof integrity. To combat this, I occasionally (maybe once every few months, or if they look particularly dull) use a rubber boot conditioner or a very small amount of silicone-based protectant. You can find these at outdoor or shoe stores, and a little goes a long way. I apply a thin layer with a soft cloth after the boots are clean and completely dry, then buff off any excess. This helps to keep the material supple, prevents it from drying out, and even restores some of that original luster. It’s a bit like moisturizing their skin – it keeps them healthy and prevents premature aging. For PVC boots, a simple wipe with a damp cloth and then a dry buff is usually sufficient, as they tend to be less prone to drying out than natural rubber.
Inspecting for Wear and Tear: Catching Issues Early
Regular inspection is another crucial step in advanced boot care. Before and after each wear (or at least weekly during heavy use), I give the boots a quick once-over. I’m looking for any signs of trouble: tiny cracks, scuffs, areas where the sole might be starting to separate, or any holes. Catching these small issues early can prevent them from becoming big, boot-ruining problems. For minor scuffs, sometimes a gentle rub with a rubber eraser or a bit of baking soda paste can make them disappear. If I spot a tiny crack, I might try a specialized rubber repair glue, but only for very small, superficial ones. Any significant damage usually means it’s time for a new pair, as compromising the waterproof barrier defeats the whole purpose of a rain boot. I also check the treads for excessive wear, as worn-down treads can make them slippery and unsafe. Being observant here can save you from unexpected leaks and ensure your child’s feet stay dry and safe.
Smart Storage Solutions: Keeping Boots Ready for Action
Alright, so the boots are sparkling clean, perfectly dry, and smelling fresh – fantastic! But the journey isn’t over yet. How you store those wellies between adventures is just as important as how you clean them. I used to just toss them into a bin by the door, and while convenient, I quickly realized this wasn’t ideal. They’d get squashed, sometimes they wouldn’t dry properly, and it just made for a messy entry. Effective storage isn’t just about tidiness; it’s about maintaining their shape, preventing damage, and ensuring they’re always ready for the next spontaneous puddle jump. Think about it: a crumpled boot can develop permanent creases, and leaving them in a dark, damp corner is just inviting mold and mildew. So, I’ve refined my boot storage strategy, and it’s made a noticeable difference in how long our boots last and how easy it is to grab them and go. It’s truly about setting up a system that supports both the boots’ longevity and your family’s daily flow.
Upright and Elevated: The Best Stance for Boots
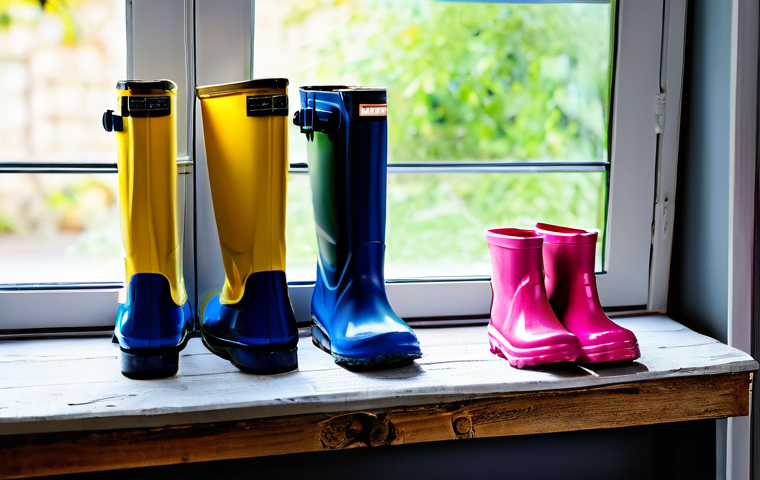
My top tip for storage is to keep boots upright and, if possible, slightly elevated. This prevents them from collapsing on themselves, which can create creases and stress points in the rubber or PVC, leading to cracks over time. A boot rack is a fantastic investment if you have space. They allow air to circulate around and inside the boots, which is crucial for preventing any residual dampness from turning into a nasty smell. If a boot rack isn’t an option, even placing them on a shoe tray with some space between them in an airy spot works. I’ve even seen clever DIY solutions using PVC pipes or even inverted plastic bottles to keep the shafts upright. The goal is to maintain their natural shape and allow for consistent airflow. This also makes them super easy to grab when those inevitable rain clouds roll in, saving you from a frantic search for matching, unstuffed boots. It’s a small change that yields big results in terms of boot health and overall household organization.
Seasonal Swaps: Protecting for the Off-Season
When the warmer months arrive and rain boots go into hibernation, proper off-season storage becomes paramount. Simply tossing them into a box in a dusty corner of the garage is a recipe for disaster. Before storing them away for an extended period, I always give them a thorough cleaning, drying, and conditioning (as discussed earlier). Then, to help them hold their shape, I might stuff the shafts with rolled-up newspaper (plain, remember!) or even cardboard tubes. This prevents them from slumping and developing creases. I store them in a cool, dry, dark place – away from direct sunlight or extreme temperatures, which can both degrade the material. A breathable fabric bag can also be a good idea to protect them from dust. I make sure not to stack anything heavy on top of them, as this can also cause damage. When the rainy season returns, they’ll emerge looking and feeling just as good as they did when they were put away, ready for new adventures!
DIY Boot Boosters: Simple Hacks for Happy Feet
Sometimes, it’s the little things, the clever hacks, that make the biggest difference in keeping those tiny feet happy and dry in their rain boots. Over the years, I’ve picked up a few fantastic DIY tips that go beyond just cleaning – they enhance comfort, prevent issues, and just make the whole rain-boot experience better for everyone involved. I remember one miserable afternoon when my youngest’s socks kept slipping down inside his boots, causing endless fussing and discomfort. That’s when I started experimenting with little tricks to make those wellies even more user-friendly. It’s not always about buying the latest gadget; often, the best solutions are simple, inexpensive, and use things you probably already have around the house. These aren’t just about extending the life of the boots, but about making sure the little ones actually enjoy wearing them, which, let’s be honest, is half the battle won when you’re a parent!
The Sock-Saver Secret: Keeping Socks in Place
If your child is anything like mine, their socks have a mysterious habit of disappearing down into the depths of their rain boots. This leads to uncomfortable bunching, rubbing, and a generally unhappy kid. My simple hack for this is to use a pair of long, knee-high socks, or even better, invest in some specific boot socks. However, if you’re using regular socks, a little piece of double-sided tape or even a tiny dab of fabric glue (the temporary kind!) placed on the inside cuff of the boot, just enough to gently adhere to the sock, can work wonders. Another trick I’ve heard (though haven’t personally tried) is to use a small, thin piece of elastic sewn onto the sock itself, just above the ankle, which then hooks under the boot’s top edge. For my kids, simply ensuring they wear tall enough socks that can be folded over the boot cuff usually does the trick. This prevents the dreaded sock-slide and keeps those little feet comfy, allowing them to focus on the fun of splashing instead of wriggling their toes to pull up their socks.
DIY Inner Comfort: Adding Warmth and Cushion
Rain boots, by their very nature, aren’t always the coziest. They’re designed for protection, not necessarily for warmth or plush comfort. But this is where you can get a little creative! For extra warmth on chilly, rainy days, I often add a pair of cozy fleece or wool insoles. You can buy these cheaply, or even cut them from an old, clean fleece blanket. They add a layer of insulation and make the boots feel much softer underfoot. Another great idea is to have a dedicated pair of “boot liners” – essentially thick, tall socks designed to peek out over the top of the boot. These not only add warmth and comfort but also protect the inside of the boots and can be easily removed for washing. For a quick, temporary fix if you’re out and about, even a few layers of newspaper (again, plain!) folded neatly can provide a bit of insulation. These simple additions can transform a basic pair of wellies into a snug haven for little feet, making those cold, wet adventures much more enjoyable for everyone.
Choosing Wisely: A Quick Guide to Durable Kids’ Boots
Let’s be honest, sometimes the best “care” starts before you even bring the boots home. Investing a little time in choosing the right pair of rain boots can save you a world of hurt (and money!) down the line. I’ve made my share of impulse buys, drawn in by cute patterns, only to find them falling apart after a few months. That’s why I’ve learned to be a bit more discerning. It’s not just about the look; it’s about the material, the construction, and how well it stands up to the rigorous demands of childhood. A durable pair of boots means fewer headaches, less frequent replacements, and ultimately, a happier budget. From my experience, prioritizing quality over fleeting trends is always the smarter play, especially when it comes to something as essential as keeping little feet dry and protected during those inevitable wet weather adventures. After all, a good pair of wellies is truly an investment in your child’s outdoor fun and comfort.
Material Matters: Rubber vs. PVC
When you’re shopping for kids’ rain boots, you’ll primarily encounter two materials: natural rubber and PVC (polyvinyl chloride). Each has its pros and cons, and understanding them can help you make an informed choice. Natural rubber boots tend to be more flexible, softer, and often more comfortable for active kids. They are also generally more environmentally friendly if sourced responsibly. However, they can be more susceptible to drying out and cracking if not properly cared for with conditioning. PVC boots, on the other hand, are typically more rigid and less expensive. They are very durable and resistant to chemicals and abrasions, making them a good option for truly rough-and-tumble play. They’re also less prone to drying out than natural rubber. The downside is they might not be as comfortable or breathable, and their environmental impact can be higher. I’ve found that for younger, more active kids, the flexibility of rubber is often preferred, but for older children who are particularly tough on their gear, a sturdy PVC might hold up better. It’s all about balancing comfort, durability, and your budget.
Construction is Key: Checking for Quality
Beyond the material, the way a boot is constructed significantly impacts its longevity and waterproof capabilities. Before buying, I always give the boots a thorough once-over. I look for reinforced seams where the sole meets the upper – this is a common failure point. Good quality boots will have solid, even seams with no visible gaps or weak spots. I also check the sole itself; is it sturdy with good tread for traction? A flimsy sole will wear out quickly and offer poor grip. The shaft of the boot should feel robust enough to stand up on its own, not flimsy. If there’s any lining, I check that it’s securely attached and doesn’t feel like it will tear or bunch up easily. While a higher price point doesn’t always guarantee quality, it’s often a good indicator that more durable materials and better construction methods have been used. Remember, you’re looking for something that can withstand countless puddles, mud slides, and general kid-chaos, so a little scrutiny before you buy can save you a lot of frustration later.
| Cleaning Scenario | Recommended Approach | Key Tools/Ingredients |
|---|---|---|
| Everyday Mud & Grime | Quick rinse/wipe down immediately after use to prevent drying. | Warm water, mild dish soap, soft cloth/sponge. |
| Stubborn Stains (Grass, Heavy Dirt) | Pre-treat stains, then gentle scrubbing. | Soft-bristled brush (old toothbrush), baking soda paste, rubbing alcohol (for grass, test first). |
| Damp Interior/Odor | Ensure thorough drying; absorb moisture and neutralize smells. | Crumpled newspaper, baking soda, essential oils (optional), boot dryer/fan. |
| Dull Rubber/Prevent Cracks | Condition material to maintain suppleness and prevent degradation. | Rubber boot conditioner, silicone protectant, soft cloth. |
Concluding Thoughts
And there you have it, fellow parents and guardians of tiny adventurers! We’ve journeyed through the muddy trenches and emerged with a arsenal of tips to keep those beloved rain boots in prime condition. It truly warms my heart to know that with a little proactive care, these humble boots can continue to spark joy and enable countless puddle-jumping memories for your little ones. Remember, it’s not just about cleanliness; it’s about extending the life of their essential gear, saving you money, and making sure every outdoor escapade is as comfortable and fun as can be. So go forth, embrace the splashes, and let their imaginations run wild, knowing their feet are well-protected!
Useful Information to Know
1. Immediate action saves time: Always brush off loose, wet mud as soon as your child comes in. Letting mud dry makes it exponentially harder to remove.
2. Gentle is best for materials: Stick to mild soaps and natural solutions like baking soda for cleaning to avoid degrading the rubber or PVC over time.
3. Thorough drying is non-negotiable: Damp interiors are the root cause of unpleasant odors and mildew. Utilize air-drying, newspaper, or a boot dryer to ensure they are completely dry.
4. Condition for longevity: For natural rubber boots, occasional conditioning prevents drying out and cracking, extending their waterproof life significantly.
5. Smart storage preserves shape: Storing boots upright and in a well-ventilated area prevents creases, maintains material integrity, and keeps them ready for the next downpour.
Key Takeaways
Keeping your child’s rain boots in excellent shape boils down to a few core principles: prompt cleaning, meticulous drying, and mindful storage. From tackling stubborn mud with baking soda to refreshing interiors with sunlight, every step contributes to prolonging their lifespan and ensuring your little one’s comfort. Don’t forget to inspect them regularly for wear and tear, and for those who enjoy a good DIY, simple hacks like newspaper for drying or insoles for warmth can make a world of difference. Investing a little time in their care means more happy puddle-stomping memories and less expense on replacements. Here’s to many more splash-filled adventures!
Frequently Asked Questions (FAQ) 📖
Q: s and answers, focusing on the human-like, experienced tone and addressing the points raised in the introduction. I will stick to the “Q1:
A: ” format.
Q: What’s the best way to get all that caked-on mud and gunk off my kid’s rain boots without endless scrubbing?
A: Oh, I totally get it! That caked-on mud can look daunting, right? But honestly, it’s easier than you think, especially if you tackle it pretty quickly after their outdoor adventures.
From my own experience, the first step is to get as much of that loose dirt off as possible. A quick rinse with a hose outdoors works wonders for the big chunks – just be careful not to get water inside!
Once the really heavy stuff is gone, grab a soft-bristled brush (an old toothbrush is perfect for those tricky treads!) and a cloth. Mix a little mild dish soap with warm water.
I usually go for about a teaspoon of soap in a liter of water. Dip your cloth or brush in, and gently scrub the outside, working from the top down. You’ll see that mud start to lift right off.
For stubborn spots or scuff marks, some parents swear by a paste of baking soda and water, or even a pencil eraser for scuffs! Finish up by wiping everything down with a clean, damp cloth to remove any soap residue, and then let them air dry.
Trust me, it makes a huge difference!
Q: My kid’s wellies always end up smelling… well, less than fresh! How can I get rid of that damp, funky odor?
A: You are not alone in this, friend! That unmistakable ‘wet shoe’ smell is a classic rite of passage for parents of puddle-jumpers. I’ve battled it many times myself!
The key is often to address the moisture and bacteria. What I’ve personally found to be a fantastic solution is a simple white vinegar and water mix. Just combine equal parts white vinegar and warm water in a spray bottle.
After your little one takes their boots off, give the inside a good misting with this solution. Vinegar is amazing because it neutralizes odors and helps fight bacteria.
Don’t worry, the vinegar smell disappears as it dries! Another trick I’ve used is sprinkling a tablespoon or two of baking soda inside each boot and letting it sit overnight.
Baking soda is a natural odor absorber. Just make sure to shake it all out before they wear them again. And honestly, the best preventative measure?
Always ensure the boots are completely air-dried between wears, ideally in a cool, shaded spot. If they’re particularly damp inside, stuffing them with newspaper can really help absorb that excess moisture and speed up drying.
Q: I want these boots to last through more than one season! What are your best tips for keeping kids’ rain boots looking good and extending their life?
A: Oh, this is where a little proactive love goes a long way, and trust me, it saves you money in the long run! I’ve learned a few things over the years.
First off, a quick wipe-down after every muddy adventure is a game-changer. It prevents dirt and grime from caking on and potentially damaging the rubber over time.
My second big tip is all about how you store them. Always keep those wellies upright, if possible, and in a cool, dry place – think a closet or a mudroom, not baking in direct sunlight or next to a hot radiator.
Direct heat and UV rays are rubber’s worst enemies, causing it to dry out, crack, and lose its vibrant color. And here’s a super simple one: encourage your kids (and yourself!) to remove their boots gently, either by hand or using a boot jack, rather than kicking them off with the other foot.
That little habit prevents stress and tears on the heel. Some parents even use special rubber boot protectors or silicone sprays every few weeks to keep the material supple, which I think is a brilliant idea for longevity!
These little habits truly make a world of difference in keeping those tiny feet dry and those boots ready for the next rainy day!
Q: What’s the best way to get all that caked-on mud and gunk off my kid’s rain boots without endless scrubbing?
A: Oh, I totally get it! That caked-on mud can look daunting, right? But honestly, it’s easier than you think, especially if you tackle it pretty quickly after their outdoor adventures.
From my own experience, the first step is to get as much of that loose dirt off as possible. A quick rinse with a hose outdoors works wonders for the big chunks – just be careful not to get water inside!
Once the really heavy stuff is gone, grab a soft-bristled brush (an old toothbrush is perfect for those tricky treads!) and a cloth. Mix a little mild dish soap with warm water.
I usually go for about a teaspoon of soap in a liter of water. Dip your cloth or brush in, and gently scrub the outside, working from the top down. You’ll see that mud start to lift right off.
For stubborn spots or scuff marks, some parents swear by a paste of baking soda and water, or even a pencil eraser for scuffs! Finish up by wiping everything down with a clean, damp cloth to remove any soap residue, and then let them air dry.
Trust me, it makes a huge difference!
Q: My kid’s wellies always end up smelling… well, less than fresh! How can I get rid of that damp, funky odor?
A: You are not alone in this, friend! That unmistakable ‘wet shoe’ smell is a classic rite of passage for parents of puddle-jumpers. I’ve battled it many times myself!
The key is often to address the moisture and bacteria. What I’ve personally found to be a fantastic solution is a simple white vinegar and water mix. Just combine equal parts white vinegar and warm water in a spray bottle.
After your little one takes their boots off, give the inside a good misting with this solution. Vinegar is amazing because it neutralizes odors and helps fight bacteria.
Don’t worry, the vinegar smell disappears as it dries! Another trick I’ve used is sprinkling a tablespoon or two of baking soda inside each boot and letting it sit overnight.
Baking soda is a natural odor absorber. Just make sure to shake it all out before they wear them again. And honestly, the best preventative measure?
Always ensure the boots are completely air-dried between wears, ideally in a cool, shaded spot. If they’re particularly damp inside, stuffing them with newspaper can really help absorb that excess moisture and speed up drying.
Q: I want these boots to last through more than one season! What are your best tips for keeping kids’ rain boots looking good and extending their life?
A: Oh, this is where a little proactive love goes a long way, and trust me, it saves you money in the long run! I’ve learned a few things over the years.
First off, a quick wipe-down after every muddy adventure is a game-changer. It prevents dirt and grime from caking on and potentially damaging the rubber over time.
My second big tip is all about how you store them. Always keep those wellies upright, if possible, and in a cool, dry place – think a closet or a mudroom, not baking in direct sunlight or next to a hot radiator.
Direct heat and UV rays are rubber’s worst enemies, causing it to dry out, crack, and lose its vibrant color. And here’s a super simple one: encourage your kids (and yourself!) to remove their boots gently, either by hand or using a boot jack, rather than kicking them off with the other foot.
That little habit prevents stress and tears on the heel. Some parents even use special rubber boot protectors or silicone sprays every few weeks to keep the material supple, which I think is a brilliant idea for longevity!
These little habits truly make a world of difference in keeping those tiny feet dry and those boots ready for the next rainy day!
📚 References
Wikipedia Encyclopedia
구글 검색 결과
구글 검색 결과
구글 검색 결과
구글 검색 결과
구글 검색 결과